Add, edit and remove user accounts
Create an account for a colleague on the Users screen, change the role or password of an account that already exists, and remove one when somebody leaves.
Everybody on a support team needs an account of their own. This page walks the Users screen: creating an account, editing it, and removing it.
Goal
Your colleague holds an account of their own, on the right role, and you know where to go back to when it has to change.
Before you begin
- Your own account must carry the administrator role. An agent who opens this screen gets Access Denied instead.
- The work address of the person you are about to create, and a starting password to hand them.
- Know which department they belong to — see Departments and teams.
- Workspace role and per-feature permission are two separate axes: Roles and per-feature permissions.
Steps
Open Administration → Users in the left-hand navigation. The roster appears with a Search users... box above it.
Press Create User at the top right. An empty form opens under the heading New User.
Fill in Full Name and Email. That address is both the sign-in name and where notifications land.
Pick a Role. The select offers two values, printed in English in both console languages: Administrator or Agent.
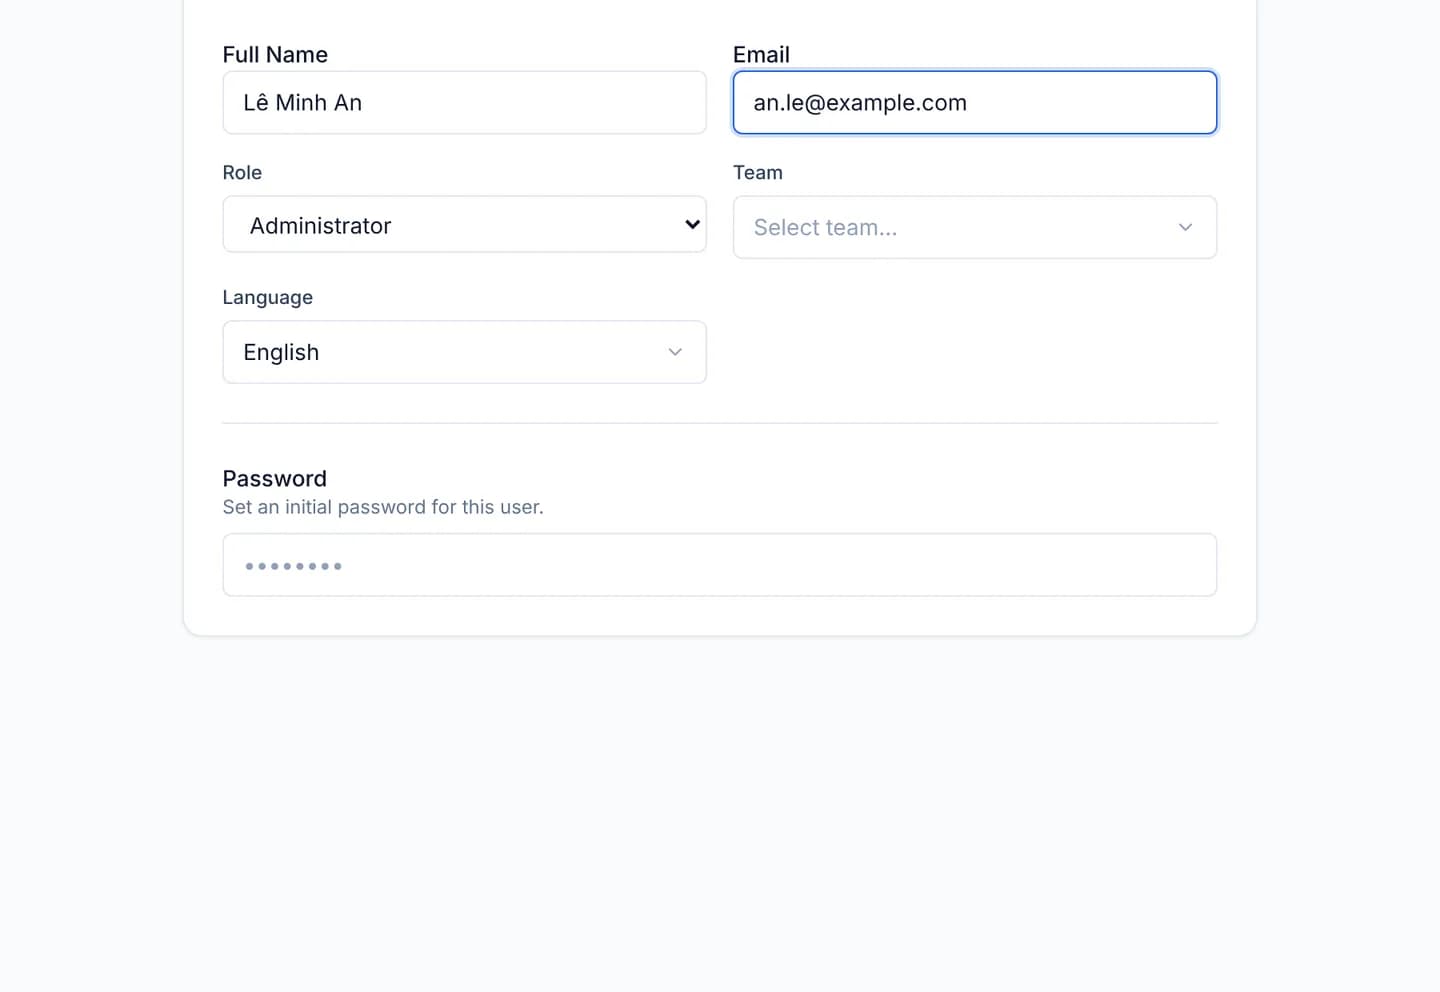
Pick a Team and a Language. Team is the department this person works in; Language sets the console language for them alone.
Type a Password. The hint under the label reads "Set an initial password for this user." — hand that password over on a separate channel.
Press Save. The console returns to the roster with the new account in it.
To edit later, press Manage User on that person's row. Leaving Reset Password empty keeps the password they already have.
To remove somebody, expand their row in the roster and press Delete User, or use the Delete button on the detail screen.
Verify
Go back to Administration → Users and find the name you created. The row carries a role badge next to the name and the email address underneath. Expand that row: the Team field reads the department you picked rather than None. Ask the person to sign in once, which is the only proof the starting password works.
There is no disabled state
The console has no switch that suspends an account: the users table carries
no status column. The only way to take access away is Delete User, and the
confirmation says so — "Permanently delete this user. This action is
irreversible." To keep the history while stopping the writes, move the person
onto a read-only group instead of deleting them; see
Grant per-feature permissions.
Troubleshooting
| Symptom | Cause | What to do |
|---|---|---|
| The screen reads Access Denied | The signed-in account is not an administrator | Ask an administrator to do it; the console prints "You must be an administrator to manage users." |
| Saving fails on a duplicate address | That address already belongs to another account | Search for the address and edit the existing account instead |
| No delete button on your own row | The console refuses to delete the signed-in account | Ask another administrator; the hint reads "You cannot delete your own account." |
| The Groups block never appears | You are on the creation form, which has no id to attach groups to | Save the account first, reopen it, then tick the groups |
| The new person signs in but cannot write | The per-feature axis is refusing them, not the role | Read Roles and per-feature permissions |
Next steps
Add Zalo, Messenger and a hotline
Build the widget picker screen: an opening line and up to six routes — Zalo, Messenger, a hotline or any link — each with its own icon and address.
Grant per-feature permissions to a group
Use the Access Rights screen to create a permission group, turn read and write on per table, and then hand that group to the people who need it.