Add Zalo, Messenger and a hotline
Build the widget picker screen: an opening line and up to six routes — Zalo, Messenger, a hotline or any link — each with its own icon and address.
Not every visitor wants to type into the panel. The widget has a picker screen where you can offer Zalo, Messenger, a hotline number or any address alongside Live chat.
Goal
A visitor opening the widget sees a picker with your opening line and up to six routes, each carrying an icon and an address.
Before you begin
- Permission to edit channels in this workspace, meaning the administrator role or its equivalent.
- The address for each route: a Zalo OA link, a Page
m.melink, a hotline astel:, or any web address. - Your own icon files, if the built-in set does not cover a route: PNG, JPG or WebP, up to 256KB.
- A page already carrying the widget, so you can try the picker after saving (Embed the widget on your website).
Steps
In the left column press Channels, open the website widget channel, pick the Widget Chat tab and scroll to Other contact channels.
Write the Channel picker message. Left empty, the widget falls back to its own translated wording.
Press Add channel. An empty row appears with an icon box, a name field and an address field.
Press the icon box at the start of the row and pick from the grid. The last entry, Upload image…, takes an icon of your own.
Fill in Display name. The channel name alone — "Zalo", not "Chat on Zalo" — because the widget builds the sentence around it.
Fill in Link. The address must start with https://, http://, mailto:,
tel: or sms:; the server rejects anything else.
Repeat for each route, up to six. Use the Move up and Move down arrows at the end of a row to set the order visitors see.
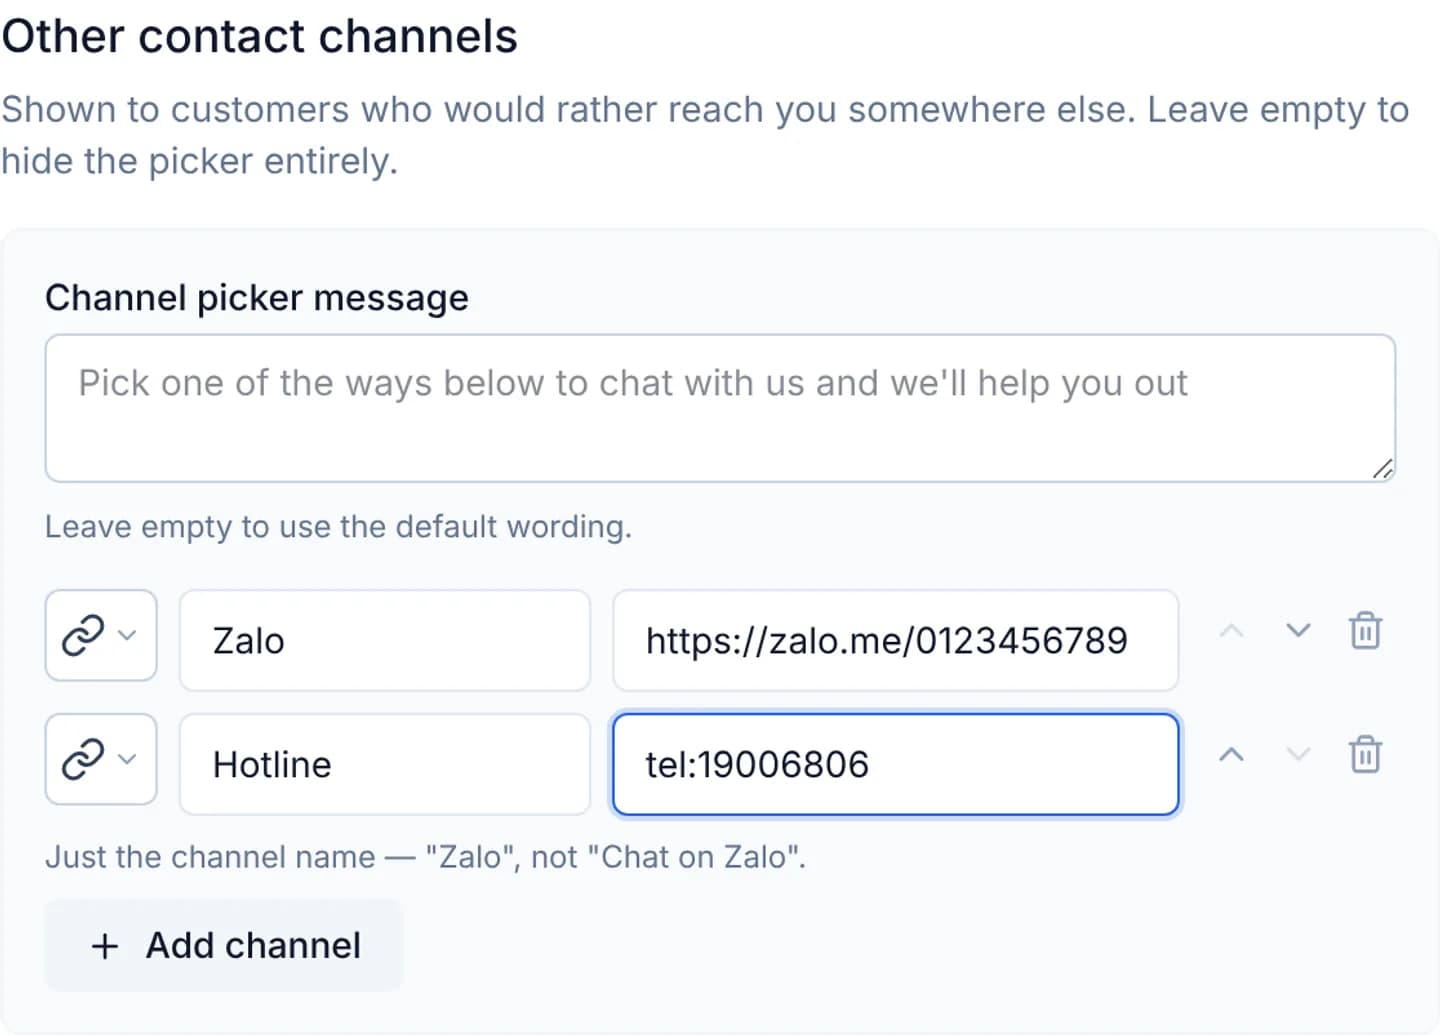
Press Save Settings. A row missing either its name or its address is silently dropped on save.
With an empty list the picker never appears, and a visitor opening the widget lands straight in the chat panel. That is also why the feature has no on/off switch of its own: adding the first route is what turns it on.
Every address you enter becomes a link on a customer's website, so the server re-checks each string rather than trusting the form. Uploaded icons are limited to PNG, JPG and WebP: SVG is refused, because an SVG opened directly on the storage host can run script there.
Verify
Reload the website carrying the widget and press the launcher. The first screen must be the picker, showing your opening line, the Live chat entry and the routes you declared in the order you set.
Try one route: the browser must open the address you entered, in a new tab. Back in the console, reopen the Widget Chat tab and confirm the rows survived the page reload.
Troubleshooting
| Symptom | Cause | What to do |
|---|---|---|
| The picker screen never appears | No route was saved, or the declared rows are missing a name or an address | Fill in both fields on every row and save again |
| A route vanishes after saving | That row had an empty field, so it was dropped on save | Re-enter the row with both a name and an address |
| The address is rejected | The string does not start with one of the accepted prefixes | Rewrite it as https://, mailto: or tel: |
| An uploaded icon does not show | Wrong file type, or larger than 256KB | Export the image as PNG or WebP under 256KB |
| The Add channel button is gone | Six routes are declared, which is the picker's ceiling | Delete a row, then add the new one |
Next steps
Allow anonymous chat, or require a sign-in
Choose between letting visitors chat straight away and requiring a sign-in, learn why the pre-chat form is not an identity, and hand over a verified session.
Add, edit and remove user accounts
Create an account for a colleague on the Users screen, change the role or password of an account that already exists, and remove one when somebody leaves.