Invite a colleague into the workspace
Create an account for a colleague in CloudFly Helpdesk: fill in the profile, pick the workspace role, set a starting password, then place them in groups.
The workspace sends no invitation email: an administrator creates the account outright and hands over the starting password. This page creates one such account for your first colleague.
Goal
Your colleague can sign in under an account of their own, carrying the right role, and sees the queue on their first visit.
Before you begin
- The account you are working from must carry the administrator role. Any other role opens this page to Access Denied.
- The full name and work address of the person you are adding; that address is their username.
- A starting password, and a way to hand it over apart from the message carrying the console address.
- A decision about where this person may write, taken from Roles and per-feature permissions.
Steps
In the left column, under Administration, press Users. The roster of workspace accounts opens.
Press Create User. The New User form opens on an empty profile.
Fill in Full Name and Email. That address is both the username and the destination for notifications, so use a work address.
Pick a Role. Agent is for the people who answer customers;
Administrator is for the people allowed to change workspace configuration.
Pick a Team if your group is divided into teams, and set the Language this person wants the console in.
Fill the Password box under the hint Set an initial password for this user. This is the password you hand over.
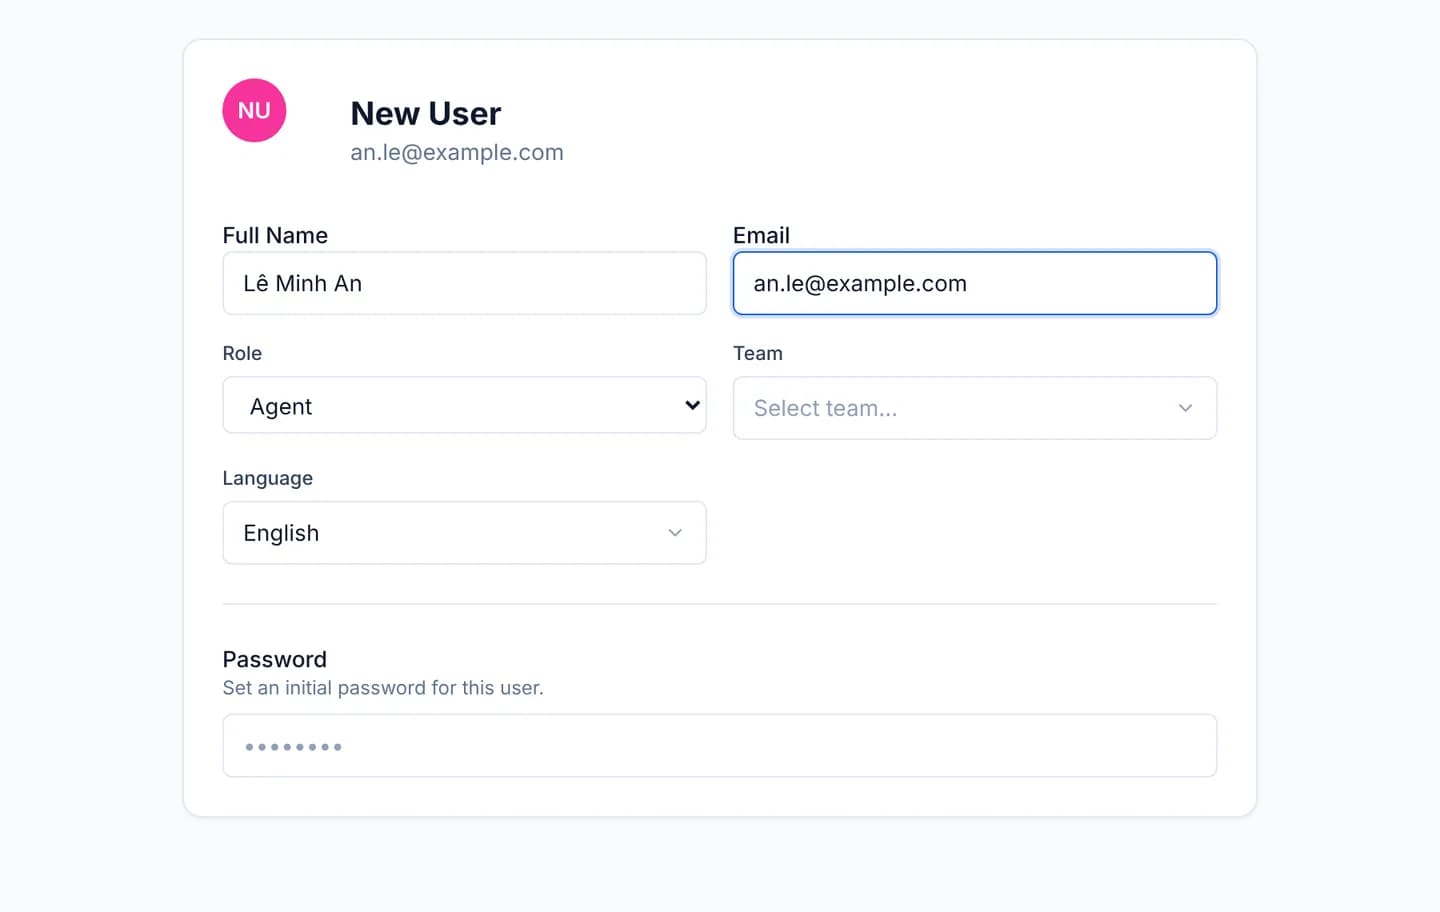
Press Save at the top right. The console reports User created successfully and returns you to the new profile.
Reopen that person from the roster and place them in the right Groups. The block belongs to an account that already exists, which is why the creation form does not offer it.
A user cannot change their own password from the console today. When one has to change, an administrator opens that profile and fills in Reset Password; leaving the box empty keeps the existing password.
Verify
The Users roster carries a new row with the name and address you entered, and the role you picked beside it. Reopen that profile and the Groups block lists exactly the groups you assigned.
The last check belongs to your colleague: have them work through Sign in and find your way around and report back that the queue is on their screen.
Troubleshooting
| Symptom | Cause | What to do |
|---|---|---|
| The page reads Access Denied | The account in use is not an administrator | Ask an administrator to create it, or to raise your role |
| Failed to save user appears | The address already belongs to somebody in this workspace | Search the roster for it; the account may exist already |
| They can sign in but cannot send a message | The workspace role is right while the per-feature access is read-only | Grant a group that carries write access to conversations |
| The Groups block is nowhere on screen | You are still on the creation form, so there is no account id yet | Save first, reopen the profile, then assign groups |
Next steps
Handle your first conversation
Answer a conversation from the queue, leave an internal note the customer never sees, take ownership of the thread, then resolve it once the work is done.
What the system is made of
The three services behind the CloudFly Helpdesk console, the path a message takes through them, and why losing the realtime link is not losing a message.