Create your first channel
Build your first channel as a website widget: name it, list the domains allowed to embed it, pick the display options, then collect the embed snippet.
The website widget is the one channel you can finish in a single sitting without waiting for anybody's approval. This page takes it from an empty screen to a snippet you can paste into your own site.
Goal
The workspace owns a working channel, and you hold the embed snippet that puts the chat panel on your website.
Before you begin
- Write access to channels. The administrator role carries it; any other account needs a permission group that grants it.
- The domain where the chat panel will be embedded, written without
https://. - Somewhere to paste a few lines of HTML into that site, or a colleague who will paste them for you.
- If the difference between a channel and an inbox is not clear yet, read Shared inboxes and channels first.
Steps
In the left column press Channels, then press Add Channel. The Choose a channel screen opens with six channel tiles.
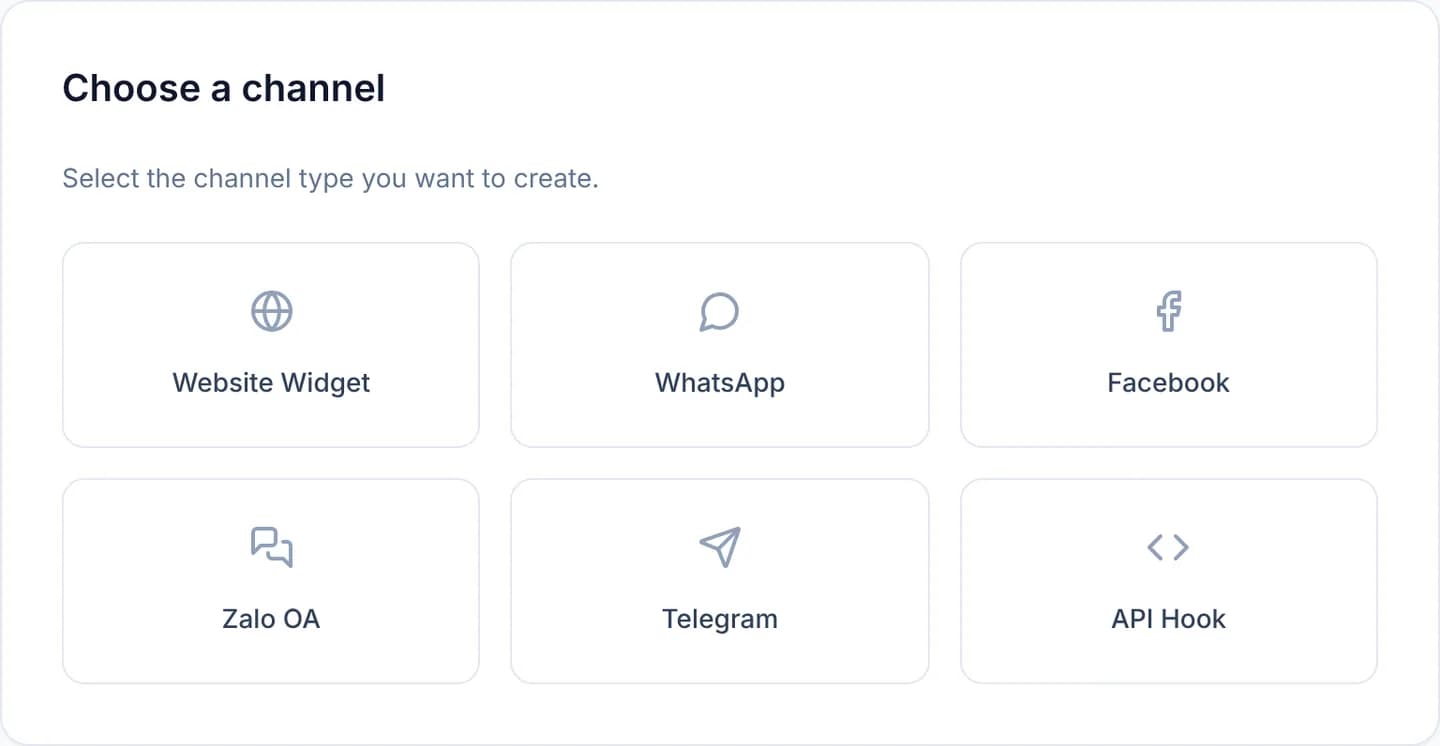
Press the Website Widget tile. The wizard moves to its second step, headed Core Profile.
Fill in Channel Name. It rides along every row in the queue, so name it
after the place customers write from, for example Website Demo.
Type the domain into Target Domain Whitelist and press Add. The domain turns into a chip under the input.
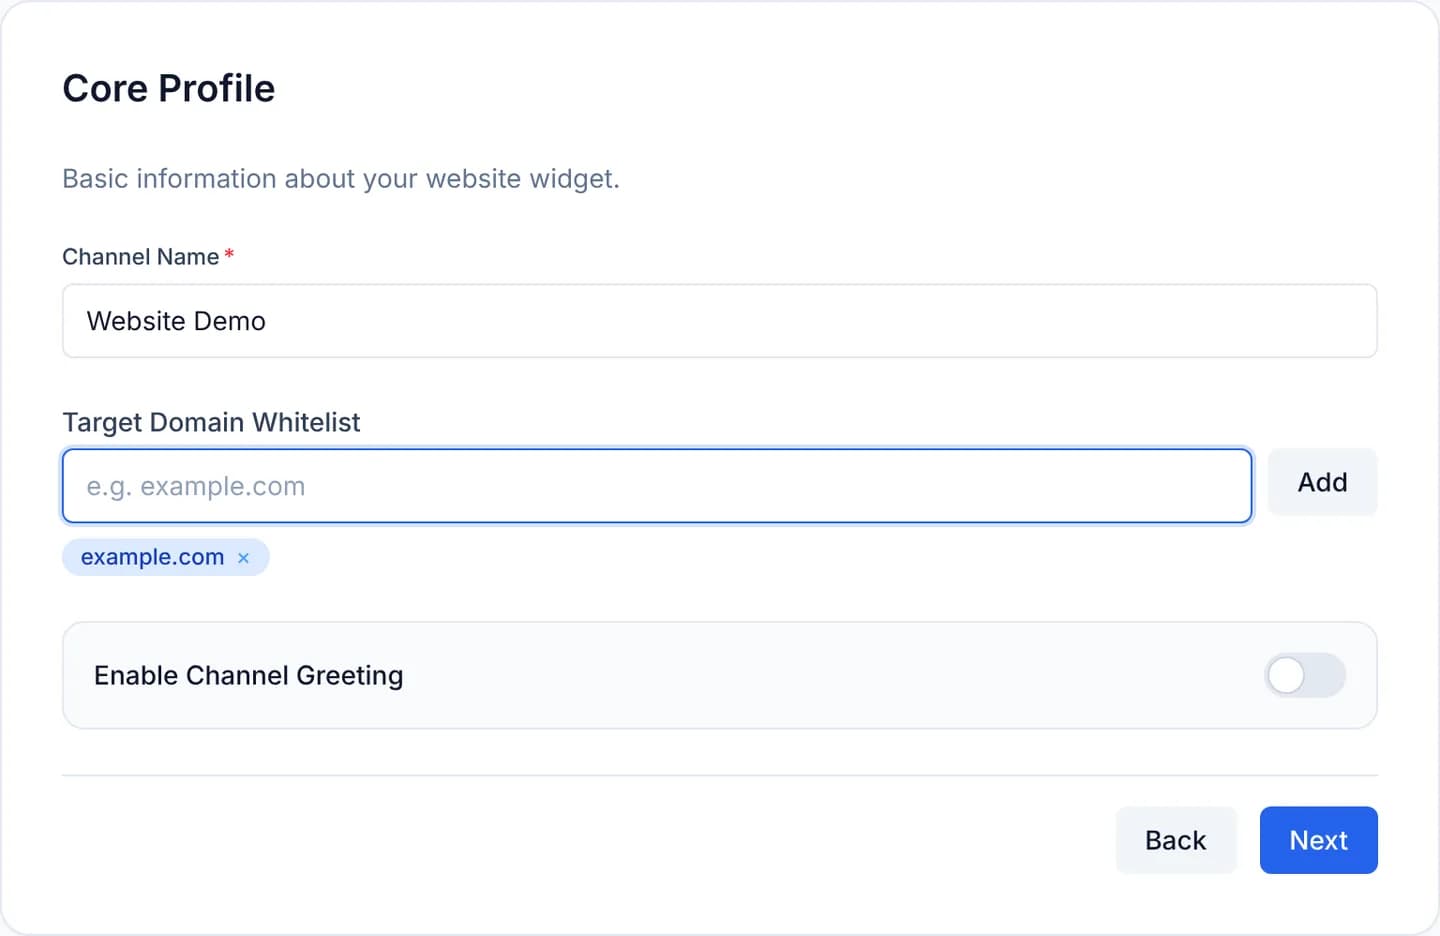
Turn on Enable Channel Greeting if the panel should greet visitors by itself, write the greeting, then press Next.
On Visual Styling & Advanced, set Widget Position and Brand Color to match the site the widget will live on.
Decide the two remaining switches, Pre-Chat Form and CSAT Surveys. The two callouts below say what each one really does.
Press Create Widget. The Success! screen shows the embed snippet with a
Copy Code button; paste that snippet before the closing </body> tag of
your site.
Press Go to Channels to return to the channel list.
Pre-Chat Form asks a visitor for a name, an email address and a phone
number before the chat starts. It collects, it does not authenticate: a
visitor can type any address at all and nothing verifies it. For an identity
you can trust, sign the visitor in on your own site and mint the session
through POST /internal/widget-sessions once your backend has authenticated
them.
CSAT Surveys shows a satisfaction screen inside the chat panel, but the system stores no score today and there is no CSAT report. Turning the switch on still shows the survey to customers; do not lean on it to measure support quality.
Verify
The Channels list shows a row carrying the name you typed. Open it, and the domain you entered is listed among the channel's domains.
After the snippet is in place, reload your website and look for the chat button in the corner named by Widget Position. Press it and send a test line: that line has to appear in the Conversations queue within seconds.
Troubleshooting
| Symptom | Cause | What to do |
|---|---|---|
| The Next button stays dim | Channel Name is still empty | Fill the name in and press it again |
| The snippet is in place but no chat button appears | The page's domain is missing from the whitelist | Open the channel, add the domain actually serving the page, reload |
| The panel opens and stays blank | The embedding page runs on a different domain from the one declared | Declare that domain too, including its www form |
| The test line never reaches the queue | The queue is filtered to another channel | Switch to the All tab at the top of the queue |
Next steps
Sign in and find your way around
Reach the CloudFly Helpdesk console for the first time with your own account, then name the three regions on screen: navigation, queue and message timeline.
Handle your first conversation
Answer a conversation from the queue, leave an internal note the customer never sees, take ownership of the thread, then resolve it once the work is done.